Perhaps you’ve seen some members at the gym rolling around on long black cylinders and wondered what they were doing. Or you have been foam rolling for a while now and wonder if you are doing it right or what the science is behind it all. I’m here to answer those questions, plus give you a few tips on how to work specific areas of your body for the most benefit!
The Science Behind Foam Rolling
Foam rolling is a form of Self-Myofascial Release (SMR), a type of stretching that uses autogenic inhibition. Our skeletal muscle contains muscle spindles and Golgi tendon organs (GTO) – when these receptors are stimulated by a change in tension, it causes the muscle to relax.
Basically, when you hit a trigger point with the roller, the GTO will turn off the muscle spindle, which allows the muscle fibers to relax – thus easing muscle tension and aiding in muscle recovery.
The chain of events is kind of like our bodies’ natural reaction to pull our hand away quickly when touching a hot pan. It is one of the body’s many safety mechanisms, and it protects us from muscle tears resulting from muscle tension. The muscles can’t release what they don’t know is there, and making our muscles aware through foam rolling is the key to unlocking this tension!
The Benefits of Foam Rolling
Working with a foam roller is great for releasing muscle tension and pain, and increasing range of motion. Foam rolling will improve your joint control and mechanics, which will give you a better workout and greater result with less chance of injury.
Whether training for your first marathon or just regular every day wear and tear, muscles get tight. When a muscle is tight, it can pull on your joints – and tight muscles cause other muscles to work harder or sometimes turn off completely. It is important to keep your muscles in balance and free from excess tension, or you can end up with joint pain or injury.
Foam rolling is extremely efficient and safe, in comparison to many standard stretches. Foam rolling is safe anytime: before, during, or after a workout. Foam rolling is effective for many areas of your body. Read on for basics on how to foam roll and tips for specific areas of the body.
How To Foam Roll
- Place foam roll under target area.
- Engage core and glutes to create a strong base.
- Roll 1 inch per second for about 60 seconds on each area, hold tender areas for 30 – 60 seconds.
Important safety tip: do not roll over joints or bones and do not roll your lower back!
Choosing a Foam Roller
Foam Rollers can be short (12 inches) or long (36 inches.) They are typically 6 inches in diameter. A number of different densities exist, so choosing one that is right for you is important.
A softer roller is best for someone new to foam rolling. Some foam rollers have bumps, waves, or grooves for a more intense experience. At FFC, we have long black rollers that are of a higher density, (which, if you are new to foam rolling, you might find it difficult or painful at first.) To alleviate discomfort, you can reduce the amount of weight on the roller by shifting your body or supporting yourself with a leg or arm. As you continue rolling daily the discomfort will reduce. See the video for more on this.
Related: click here for a free 1-hour personal training session at FFC!
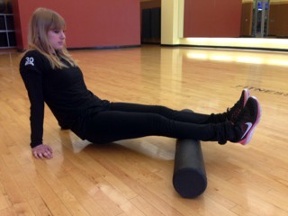
Calves (lower back of legs): put the roller under a calf. Rest your other foot on the floor. Roll from the ankle to below the knee. Rotate the leg in, then out. Stack ankles to add pressure. Roll both calves at once for less pressure.
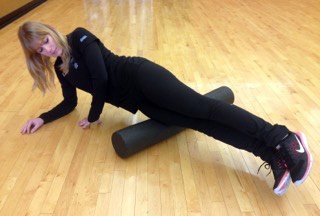
Iliotibial Band (side of legs): lie on your side with the roller near your hip, rest your other leg’s foot on the floor. Roll down your outer thigh toward your knee. Increase pressure by stacking your legs.
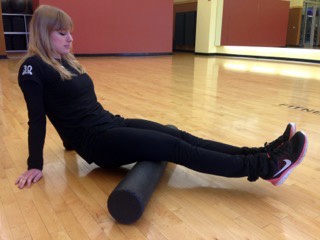
Hamstrings (upper back of legs): place the roller under your thighs. Roll from the knees to the buttocks. To increase the pressure, roll one leg at time, turning your leg in and out.
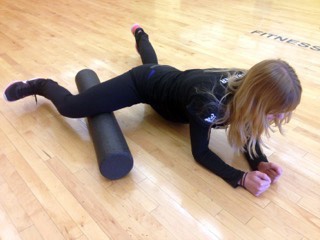
Adductors (inside of thighs): lie on your stomach with one leg extended slightly to the side, knee bent. Place the roller in the groin area of the extended leg and roll the inner thigh.
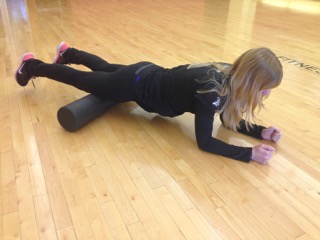
Quadriceps (upper front of legs): lie on your stomach with a roller placed under the front of your thigh and slowly roll up and down from the bottom of your hip to the top of your knee.
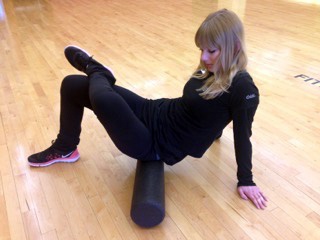
Glutes (your backside): sit on the roller and place one foot on the opposite knee. Lean into one buttock and roll forward and back, using your supporting leg to control the pressure.
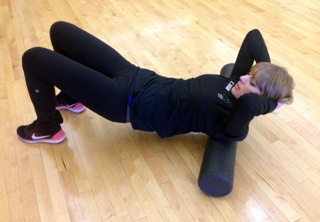
Mid Back: put the roller under your middle back and lie down. Support your head, and get long hair out of the way. Roll from bottom of your ribs to top of your shoulders. Rotate your torso to get into your lats.
For more information or to schedule a one-on-one foam rolling demonstration with Jessica, email her at jfrank@ffc.com. See more at the following YouTube video link: https://www.youtube.com/watch?time_continue=1&v=zIXFFPMM-Ac
Post written by FFC West Loop Personal Trainer Jessica Frank.